Implementing Microfrontends in Nuxt.js using Svelte and Ara Framework
(Source/Credits: https://dev.to/phillipgd1992/implementing-microfrontends-in-nuxt-js-using-svelte-and-ara-framework-1b65)
We know the Frontend technologies evolve pretty fast. Nowadays, Svelte has become very popular, and more developers have started using it. However, Sapper is not too much mature like Nuxt.js or Next.js to create universal applications using Svelte. What if we could use it in Nuxt.js?.
title: Implementing Microfrontends in Nuxt.js using Svelte and Ara Framework published: true description: We know the Frontend technologies evolve pretty fast. Nowadays, Svelte has become very popular, and more developers have started using it. However, Sapper is not too much mature like Nuxt.js or Next.js to create universal applications using Svelte. What if we could use it in Nuxt.js?. tags: Microfrontends, Nuxt.js, Svelte, Universal Applications

Demo code here
This article was originally written in Ara blog.
Nuxt.js is the most popular framework to easily develop Universal Applications using Vue.js. It also supports static websites, single-page, mobile, and desktop applications.
What is a universal application?

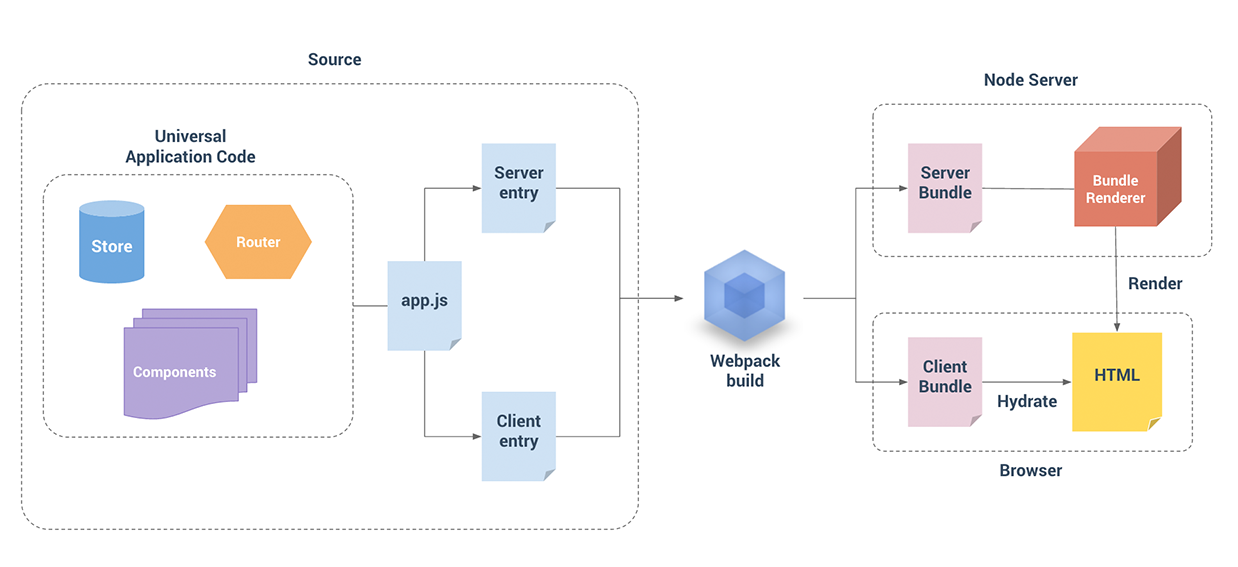
The main characteristic of a universal application is it uses the same JavaScript code on the server and browser. Therefore we can use the same Vue.js components to server-side and client-side rendering and get the benefits of both worlds.
This course video explains more about Universal Applications with Nuxt.js.
What do Microfrontends role play here?
We know the Frontend technologies evolve pretty fast. Nowadays, Svelte has become very popular, and more developers have started using it.
Sapper is one alternative to develop universal applications using Svelte. However, Sapper is not too much mature like Nuxt.js or Next.js. What if we could use Svelte in Nuxt.js?.
This is a perfect scenario where we can take advantage of the Tech Agnostic principle of Microfrontends. So, Why we need to wait until Sapper become to mature like other frameworks? We shouldn't. We can re-use what already exists.
Setup Nuxt project
Create a folder named ara-nuxt and run the nuxt app generator create-nuxt-app inside the folder:
shell
npx create-nuxt-app nuxt-site
The command asks for some configurations, choose the default options.
Finally, run the Nuxt application inside the nuxt-site folder:
PORT=8000 yarn dev
The Nuxt application runs on http://localhost:8000.
Browser:

Setup Nova Service
Create a Nova service that use Svelte to render the Nova views.
Install Ara CLI:
shell
npm i -g ara-cli
Create the Nova service:
shell
ara new:nova -t svelte nova
Go to the Nova service folder:
shell
cd nova
Run Nova service:
shell
npm run dev
The Nova service runs on http://localhost:3000.
Test the Nova Service.
Once the Nova service is running you can make a POST request to http://localhost:3000/batch using a payload like:
json
{
  "uuid": {
    "name": "Example",
    "data": {
      "title": "Ara Framework"
    }
  }
}
The results property in the response contains the html of the view rendered by the Nova service.
Example:
json
{
  "success": true,
  "error": null,
  "results": {
    "uuid": {
      "name": "Example",
      "html": "<div data-hypernova-key=\"Example\" data-hypernova-id=\"4c08ba37-4b1a-4387-a883-99726e6b4617\"><h1>Hello Ara Framework</h1></div>\n<script type=\"application/json\" data-hypernova-key=\"Example\" data-hypernova-id=\"4c08ba37-4b1a-4387-a883-99726e6b4617\"><!--{\"title\":\"Ara Framework\"}--></script>",
      "meta": {},
      "duration": 1.210146,
      "statusCode": 200,
      "success": true,
      "error": null
    }
  }
}
Setup Nova Bridge in Nuxt.js
The Nova Bridge enables us to use Nova Views on any view library such as React, Vue.js, and others. Read more about Nova Bridge here.
Go to nuxt-site folder and install nova-vue-bridge in Nuxt.js:
shell
yarn add nova-vue-bridge
Add @babel/plugin-transform-modules-commonjs plugin for babel in nuxt.config.js file.
nuxt.config.js
js
{
  ...
  build: {
    /*
    ** You can extend webpack config here
    */
    babel: {
      plugins: [
        '@babel/plugin-transform-modules-commonjs'
      ],
    },
    ...
  }
}
Implement Nova view (Svelte) in Nuxt.js
Use the Nova component into a Nuxt page pages/index.vue.
Import Nova component:
```vue
```
Use Nova component in page:
```vue
nuxt-site
...
```
Client-side rendering
Update the client-side entry point in order to render and mount the view on placeholder rendered by Nova Bridge.
nova/src/client.js
```js import { renderInPlaceholder } from 'hypernova-svelte'
import Example from './components/Example.svelte'
const { document } = global
document.addEventListener('NovaMount', (event) => { const { detail: { name, id } } = event if (name === 'Example') { return renderInPlaceholder(name, Example, id) } }) ```
Add client-side script on page:
pages/index.vue
js
export default {
  components: {
    Logo,
    Nova
  },
  head: {
    script: [
      { src: 'http://localhost:3000/public/client.js' }
    ]
  }
}
Run the Nuxt application again:
PORT=8000 yarn dev
Finally, the Nova view is rendered and mounted correctly displaying a heading text saying "Hello Ara Framework"
Browser:

Server-side rendering
The Nova View is not server-side render yet, so if we disable the client-side script nothing is displayed. We need to implement Nova Proxy in order to server-side render and include the Nova views. Read more about the Nova Architecture here.
Setup Nova Proxy
Create a configuration file for Nova Proxy in the root folder:
touch nova-proxy.json
Add the following configuration in nova-proxy.json file to proxy the incoming requests to the Nuxt application.
json
{
  "locations": [
    {
      "path": "/",
      "host": "http://localhost:8000",
      "modifyResponse": true
    }
  ]
}
Run Nova Proxy
Before running the command we need to set the HYPERNOVA_BATCH variable using the Nova service endpoint.
shell
export HYPERNOVA_BATCH=http://localhost:3000/batch
Run the following command where the noxa-proxy.json file was created or pass the --config parameter with the configuration file path.
ara run:proxy --config ./nova-proxy.json
The command runs Nova Proxy on http://localhost:8080.
Now, see how the Nova view is displayed even if the client-side script is disabled, it's because the page coming from the webserver contains the rendered HTML for the Nova view.
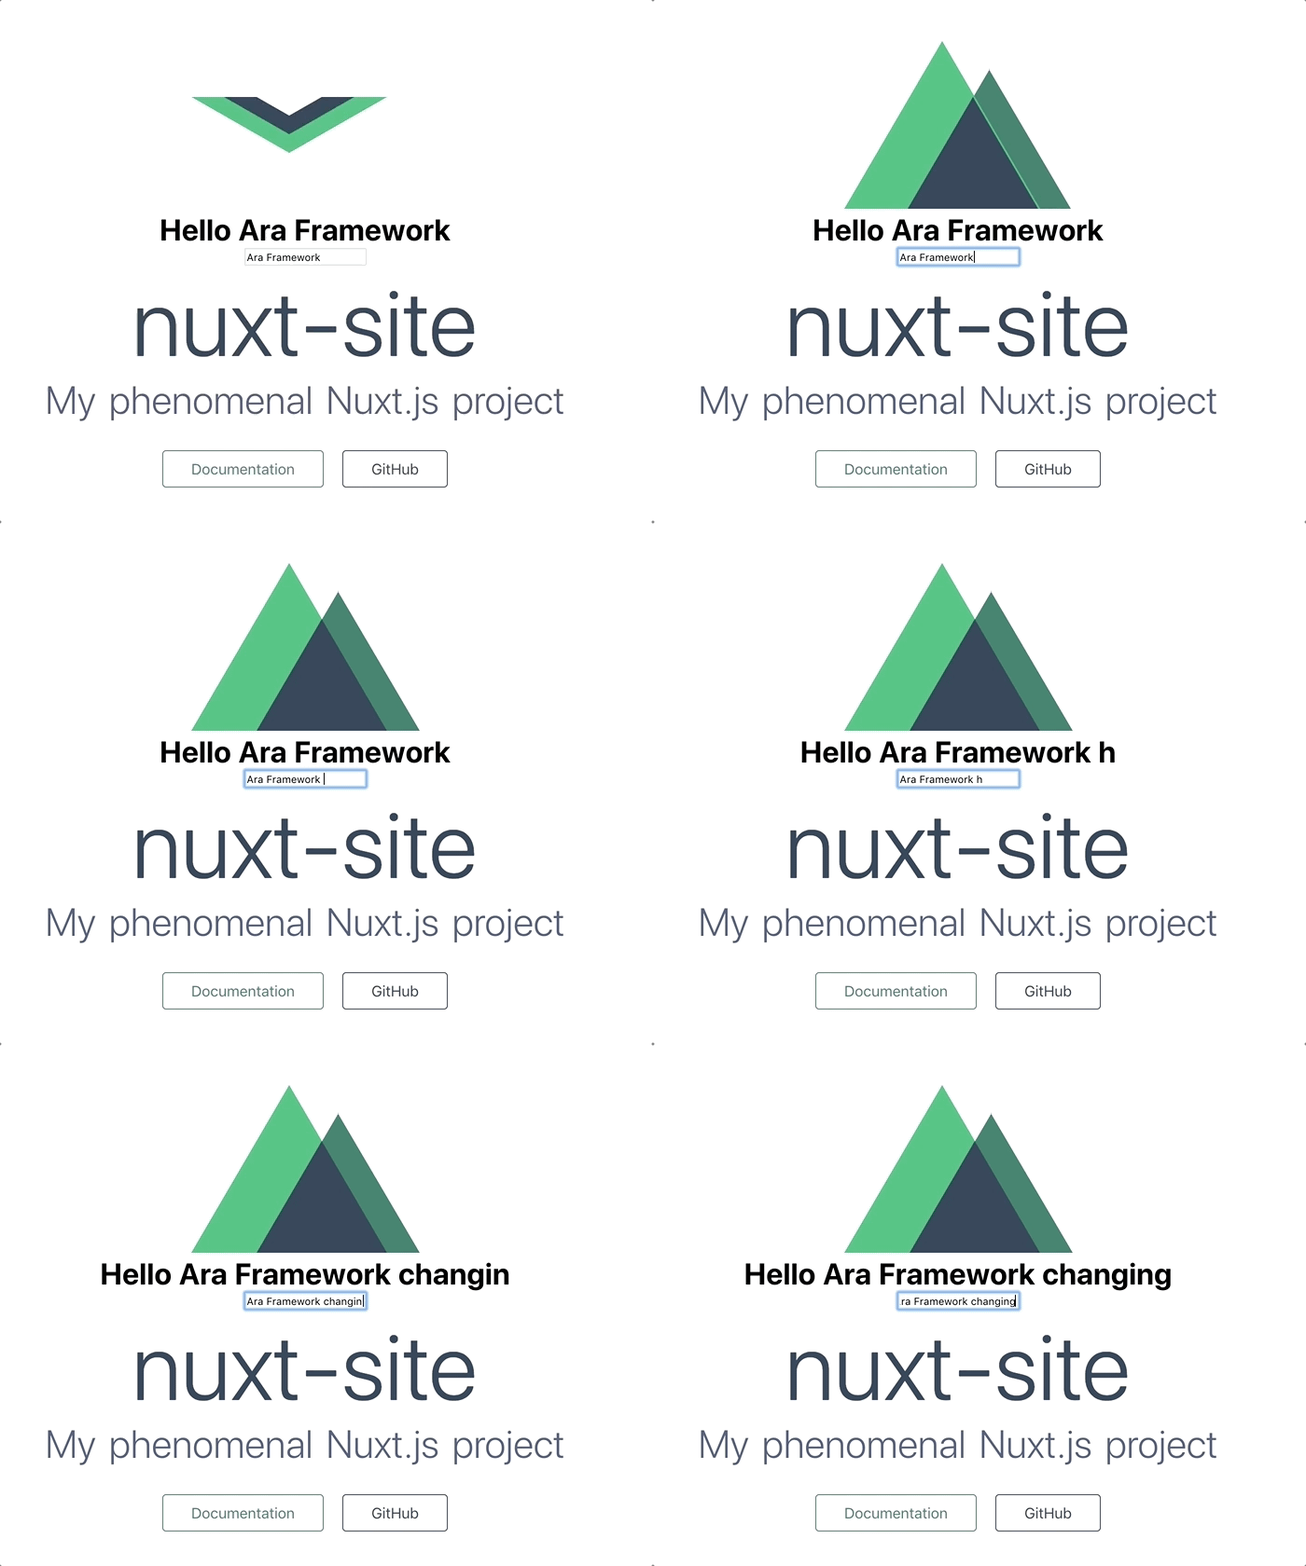
Update the Example View
The Example view is just displaying a heading. We can update it adding an input that changes the heading text.
nova/src/components/Example.svelte
```svelte
Hello {title}
```
Browser:

Conclusion
Micro-frontends enable us to integrate different frameworks into the same page, but it doesn’t mean that we should mix frameworks arbitrarily. We should define standard frameworks and libraries across the company.
However, this level of isolation gives us the flexibility to evolve our web application along with the web technologies.
Comments section